Back to TheWorxHub for Senior Living Main Menu
Exploring Drawings and Layers
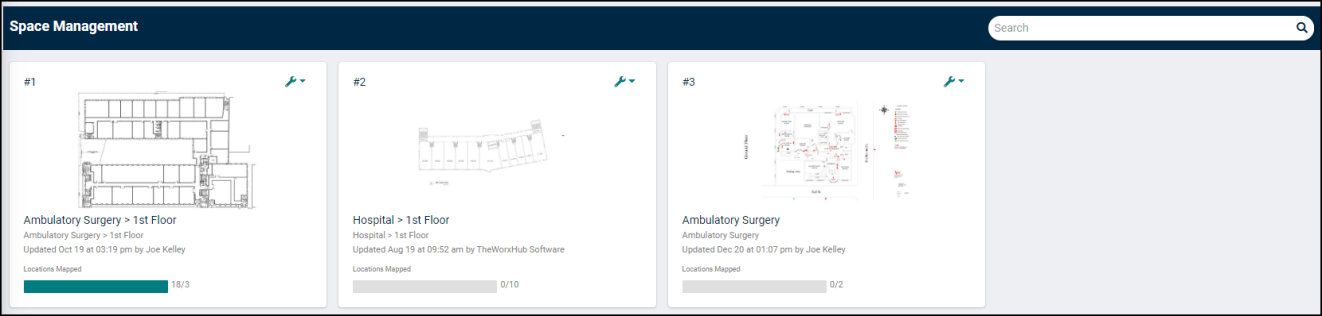
There are several options available for exploring Drawings and Layers once you have set up your drawings in TheWorxHub. You can view information about mapped locations, display the work orders and assets at each location, and turn on additional layers depending on your needs.
To Explore Drawings and Layers:
-
Click on the Space Management tab. *Note: This will take you outside of the normal interface and into the Space Management module.
- If necessary, filter the Dashboard using the Search field.
How to Edit the Name of a Drawing
Once you have added a drawing, you can edit its name from the dashboard.
- Click on the wrench icon (
 ).
). - Click Edit Name.
- Enter the new Drawing Name.
- Click on the Save Changes button.

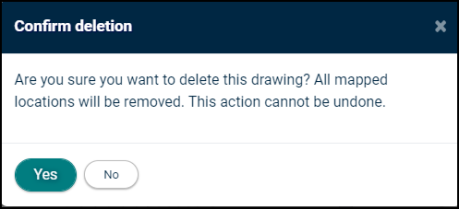
How to Delete a Drawing
Once you have added a drawing, it can be deleted from the dashboard.
- Click on the wrench icon ( ).
- Click Delete Drawing.
- Click Yes to confirm the deletion of the drawing. *Note: This will remove all mapped locations and this action cannot be undone.
How to View Location Information
- Click on the drawing you would like to explore.
- From the drawing, click on a mapped location. This will expand a side panel with information about the Location.
- If the Location in TheWorxHub has an image, it will display, as well as any Attachments that have been tied to the location.
-
Click the Add Attachment button to add additional Attachments to the location.
-
Click the trashcan icon (
 ) to delete Attachments from the location.
 -
Click the hamburger menu (
 ) at the top of the panel and select Edit Location to open the Location record in a new tab.
 - From this menu, you can also adjust the Mapping of this location by selecting Change Unit or Remove Mapping.
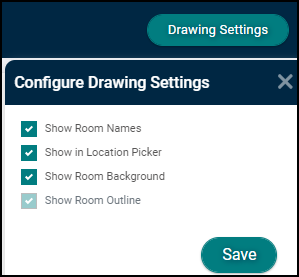
How to Configure a Drawing
- Click on the drawing you would like to configure.
- Click the Drawing Settings button.
- Check the Show Room Names box to display the room names on the drawing.
- Check the Show in Location Picker box to enable the drawing in the location picker.
- To make the room background color visible on the drawing, check the Show Room Background box.
- To display a border around each room on the drawing, check the Show Room Outline box.
- Click Save.
How to Estimate Square Footage on a Drawing
You can estimate the square footage of a mapped location on your drawings. *Note: If the drawing does not have any locations with square footage added, a notification will display that says "To use this functionality, manually enter the Sq. ft for any of your locations on this drawing. A scale needs to be set in order to approximate square footage for rooms."
-
Click on the drawing you would like to explore.
-
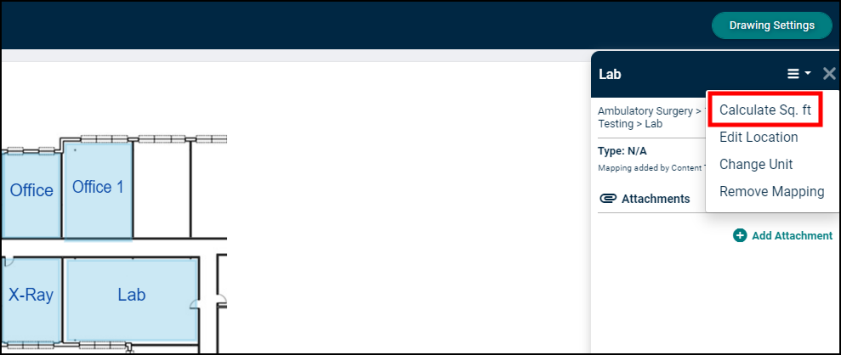
Click on the location you would like to estimate square footage for.
-
In the panel that expands, click on the menu icon (
 ).
). -
Click Calculate Sq. ft. The square footage will now display.
How to Display Work Orders on a Drawing
- Click on the drawing you would like to explore.
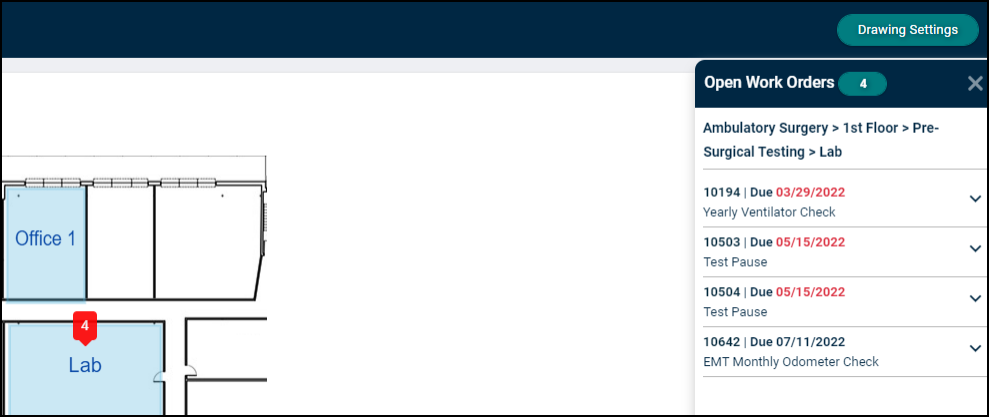
- Select the WOs tab from the Explore panel. This will display the number of work orders at each mapped location in red.
- The work orders displayed can be adjusted by clicking the blue Filter link in the top right hand corner of the window. This will open a side panel where filtering selections can be made.
- You can filter by Department, Priority, Due Date, Date Created, Category, and Subcategory. Selections made here will filter the work orders displayed automatically.
- Click on the number tagged on a location to expand the Open Work Orders side panel. This will display a list of the open work orders at this location, as well as their due dates.
- To view more information about a specific work order, click on the arrow icon next to that work order.
- If you would like to open a specific work order, click on the blue work order number. This will open the work order record in a new tab.
How to Display Assets on a Drawing
- Click on the drawing you would like to explore.
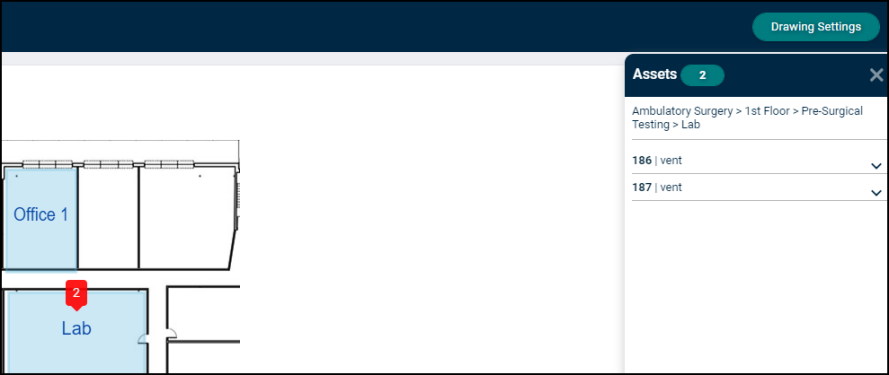
- Select the Assets tab from the Explore panel. This will display the number of assets at each mapped location in red.
- The assets displayed can be adjusted by clicking the blue Filter link in the top right hand corner of the window. This will open a side panel where filtering selections can be made.
- You can filter by Department, Status, Category, and Subcategory. Selections made here will filter the assets displayed automatically.
- Click on the number tagged on a location to expand the Assets side panel. This will display a list of the assets at this location.
- To view more information about a specific asset, click on the arrow icon next to that work order.
- If you would like to open a specific asset, click on the blue asset number. This will open the asset in a new tab.
Exploring Layers
- Click on the drawing you would like to explore.
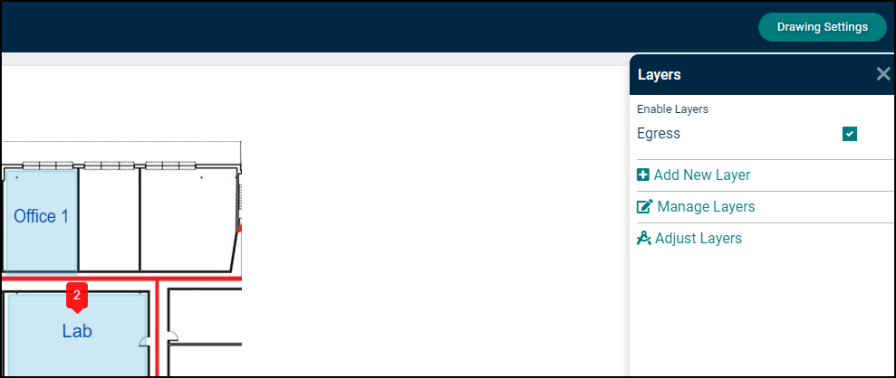
- Select the Layers tab from the Explore panel. This will expand the Layers side panel.
- To display a layer, check the box next to it under Enable Layers.
Managing Layers
Once layers have been added to a drawing, they can be edited, renamed, and removed.
- Click on the Manage Layers link.
- Click on the edit icon (
 ) next to the layer you'd like to edit.
 - If necessary, enter the new Layer Name.
- Choose whether or not to Show room mapping highlights. This will determine if all mapped locations should still display when this layer is turned on.
- Choose whether or not to Show room names. This will determine if the names of all mapped locations should still display when this layer is turned on.
- Click Submit to save any changes.
Deleting Layers
- Click on the Manage Layers link.
- Click on the edit icon (
 ) next to the layer you'd like to delete.
 - Click the Delete Layer button.
- Click Yes to confirm the deletion of the layer.
Adjusting Layers
Once layers have been added to a drawing, you can adjust their position to ensure that critical elements are correctly placed on the drawing.
- Click on the Adjust Layers link.
- Select the layer you would like to adjust from the Select a layer drop-down menu in the top left corner of the drawing.
- Click on the Lock base drawing toggle if it is not turned on.
- You can now click and drag the layer or use the arrow icons in the top left corner of the drawing to position it correctly against the base drawing.
- Click Save Layer to save any changes.
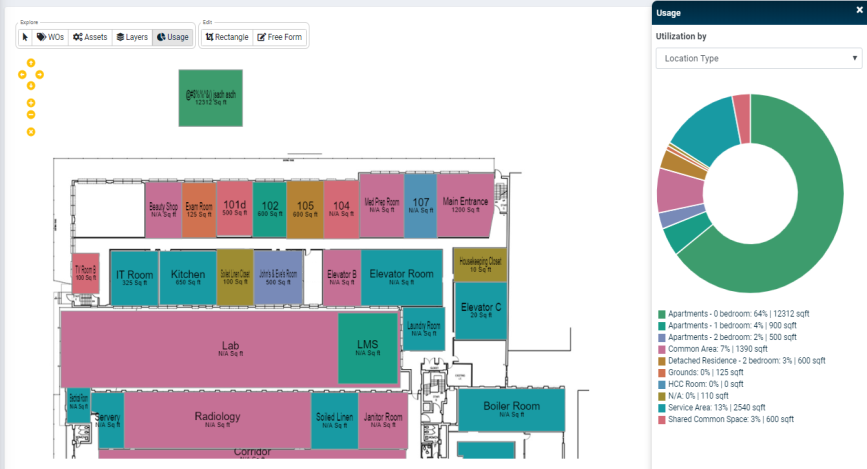
Viewing Usage
- Click on the drawing you would like to explore.
- Select the Usage tab from the Explore panel. This will display a color coded drawing indicating how each space is being used.
- Click on the Utilization by drop down to change the usage view.
- Click on a Location from the drawing to open a side panel that displays further information, including square footage if it has been added for that Location.